This article describes my efforts to make a leather needle case inspired by a pin case from the 14th century of which I saw a photo. Additional photos of several other cases of various shapes that seemed to be similar in construction informed some of my decisions about how to approach things. But I feel I should mention that this was not an A&S project. My goal was to produce something plausibly-medieval in construction and appearance that could be used by an S.C.A. member at events, not to reproduce the methods and techniques that were used to create the pieces that inspired me. Additionally, my leather-working experience is limited and I simply didn't have time to improve my skills between my first sight of the photo and the event at which I wished to present the finished case. So while this article lays out the approach I took to completing the project, I can offer you no information on whether or to what degree it resembles the medieval approach to the same sort of items. It is also quite likely that it does not represent the easiest or best approach available to the modern leather worker.
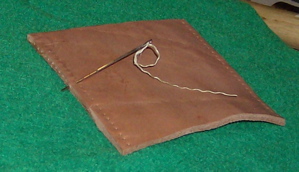
I cut a piece of wood to the size and shape I wanted the inside of the case to be. Then I cut a piece of 6-to-7-ounce leather the right size to wrap around it, so that the edges just butted together.
I soaked the leather briefly, then punched evenly-spaced holes (an eighth of an inch apart) along both ends. The holes were made at an angle, in through the outside face of the leather and out through the edge. I marked their placement first, using a ruler to measure the intervals and a blunt tapestry needle to dimple the leather where I wanted to make the holes.
A professional leatherworker probably would've used an awl to punch the holes, but I didn't have one small enough. Glover's needles have very sharp triangular points that pierce leather easily and make large enough holes for my purposes, so I used one of those. I held it at the angle I wanted with one hand and pushed it through with the thumb of the other, carefully interposing a small scrap of dry leather between my flesh and the head of the needle.
Using a pair of stitching needles and a length of waxed linen thread (purchased that way from a leather supply store), I joined the two edges with a butted seam. I tried doing this two ways:
I didn't find either significantly easier than the other, or notice any appreciable difference in the finished product.
The butted seam itself is made like this:
|
Each end of the length of sinew is threaded onto a needle that has a smaller diameter than the tool you used to punch the holes. I found smaller, shorter needles easier to work with. One needle is put through the first hole on one side, in through the face of the leather and out through the edge. Then it's put through the first hole on the other side, in through the edge and out through the face. 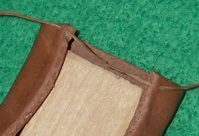 You have the middle of your thread between the edges of the leather, and a needle with thread on it dangling from each side. |
 |
 |
One needle is put through the second hole on the side it's on, in through the face of the leather and out through the edge. Then it's put through the second hole on the other side, in through the edge of the leather and out through the face. 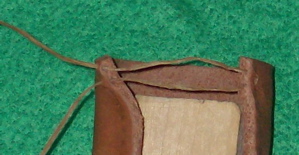 Now both needles are on one side, one above the other. |
|
The upper needle is put through the second hole on the side it's on, in through the face of the leather and out through the edge. Then it's put through the second hole on the other side, in through the edge of the leather and out through the face.  Now you have the needles on opposite sides again, with two strands of thread running between the holes they're coming out of. |
 |
 |
You continue on in this fashion until you reach the other end of the edges you're joining. Every few stitches you pull the threads snug, drawing the edges together. 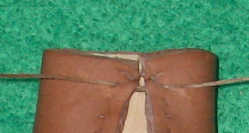 When you reach the end, you make sure the stitching is even and smooth and your seam is nice and tight, inserting a blunt tapestry needle or something similar under the loops where necessary and pulling on it to carefully work any slack down to the needle ends of the thread. Then you turn the work and stitch in the other direction for two or three stitches before cutting off the excess thread level with the surface. |
|
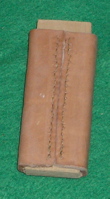
Leave the piece to dry overnight. After that, it will be fairly stiff. You should be able to slip it off the form without loosing its shape. (The leather doesn't shrink much, by the way. The picture to the right shows a different piece than the pictures above. I soaked the first for too long and the leather got so mushy that the thread cut right through it when I pulled the stitches tight. The second one, obviously, was cut a little shorter. If you don't encounter any resistance when you start to poke your holes, let the leather dry a bit before you proceed, and you'll save yourself the hassle of starting over.) |
 |
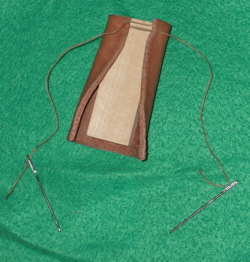
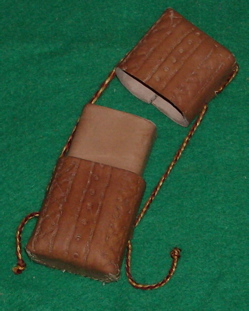
Next I cut another piece of leather into a rectangle a little longer top to bottom than the first with two tabs roughly the size and shape of the ends of the tube I'd made projecting from the center top and bottom edges. Using stamps, I created a simple pattern on the middle section. Then I cut two pairs of slits just to either side of that area, one near the top and one near the bottom. I fed a blunt tapestry needle through each pair of slits and wiggled it around, to stretch the openings a bit. Then I punched evenly-spaced holes along the straight edges, again using my glover's needle. The ones along the sides were angled like the ones on the first piece of leather. The ones on the top and bottom went straight through. Finally, I cut the piece in two, across the middle.

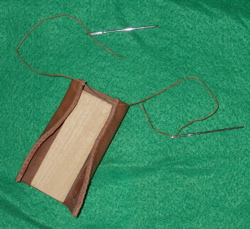
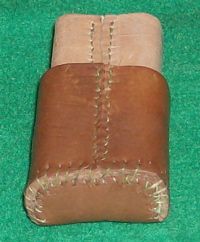
I wrapped the bottom section around the tube, folded the end tab down, and marked the exact shape of the end of the tube (along the outside edges). I carefully trimmed the leather to fit. Then I punched evenly-spaced holes that went straight through the leather around the edge of the tab. I dampened the bottom edge of the tube and punched angled holes through it. Then I used a sewing needle smaller in diameter than the glover's needle to whip-stitch the tab onto the end of the tube.
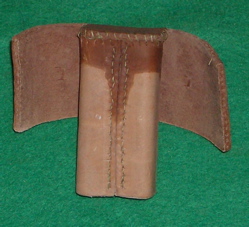
I wrapped the ends of the outer piece of leather around the tube and joined them with a butted seam. Then I used a glover's needle to whip-stitch the bottom edge to the outer edge of the tab. It went through the pre-punched holes in the outer leather, but pierced new ones in the tab. (I tried several different approaches, and that worked best.)
The end result was a fairly smooth look from the front, but a lot of visible stitching on the bottom and back.

I repeated the process of marking, trimming, and punching the tab on the remaining section of leather, but angling the holes this time. I joined the ends of the leather using a butted seam. Then I used a sewing needle smaller in diameter than the glover's needle to whip-stitch the tab to the top edge.
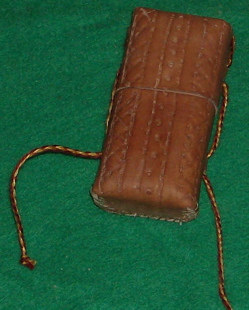
Finally, I threaded a blunt tapestry needle with a length of four-strand round braid I'd made in advance, and ran it through the pair of slits on the right side of the bottom, through the right and then the left pair on the top, and then through the right pair on the bottom. (It was easy enough to get it through the top, but I had to dampen the inner layer of leather on the bottom so I could bend it out of the way to run it through the slits there. I probably should've put the braid on earlier, or found a way to make the leather between the slits form a more open tube, like those on the inspiration piece. But I didn't realize that until it was too late.)
I tied matching knots on both ends of the braid, then inserted the form back into the tube, put the top on, and left the whole thing to dry overnight. Then I removed the form.
I allowed the leather to dry without the form for a few more hours, until I was sure absolutely all the damp had gone, before I put in the needles.
The cases I made were all small. They were designed to hold needles and/or pins for sewing, and scaled appropriately. Some of the cases I looked at while planning the project, however, were significantly larger, and I know of no reason this approach wouldn't function as well for making a bigger case as for making a smaller one (however well that might, in your estimation, be).
This page was written and is maintained by Coblaith Muimnech, who holds the copyright to all elements of it. Please do not republish any part of the text or images without first obtaining explicit permission to do so.
Click to visit Coblaith's homepage.