Sewing a Flat-Felled Seam
|
A flat-felled seam has a very distinctive profile, viewed
end-on. Each of the joined edges is enfolded by the other, creating
a design reminiscent of the interlocking arms of a Greek Key
or a similar motif.
Flat-felled seams are very strong, being made with at least
two parallel rows of stitches that reinforce one another. They
also have (as suggested by the name) a flat, smooth profile on
both sides when finished, which makes them a good choice any
time you want both sides of a joined fabric to show or where
a seam that didn't lie flat might rub uncomfortably against skin
or catch on jewelry.
Variations on the flat-felled seam appear to have been popular
throughout the Middle Ages and Renaissance. Heather Rose Jones
describes several seen in surviving medieval garments of both
wool and linen in her article, Archaeological
Sewing. Here I'll be demonstrating what I consider
to be the basic flat-felling technique, yielding the type of
flat-felled seam most commonly sewn today.
|
 |
In these instructions, I'm going to label one side of my fabrics
"A" and the other "B". Either could serve
as the face of the finished seam, depending on the look you want.
(Or, of course, if you're making something like a tent or a flag,
where both sides will show, both could.)
Before you cut your fabric, decide how wide you want the finished
seam to be. Make that your seam allowance. In my sample piece,
the seam allowance was about a quarter inch. It is possible (and
often desirable) to make finer flat-felled seams. An accomplished
needleworker (which description I do not apply to myself) can,
given the right fabric and needle, make one that's almost invisible.
But it's also fine to make a wider one, if that suits your needs.
 |
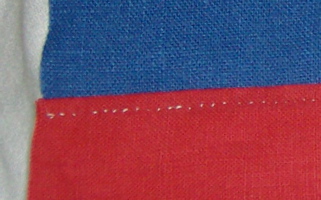
When you're ready to sew, lay your fabrics one on top of the
other, sides "A" together, with the edges you mean
to seam offset by one seam allowance. Join the fabrics one seam
allowance from the edge of the upper piece, using the stitch
of your choice. Remember that this stitching will be visible
on Side B (and only Side B) of the finished seam, against a background
of the lower fabric, and choose your thread and stitch accordingly.
I used a basic running
stitch for this phase of my seam. A backstitch or a double
running stitch would also have worked well.
|
|
Now fold the lower fabric up along the edge of the upper fabric.
It's edge should meet the line of stitching.
You can press this fold if you like. I was hand sewing and
using a linen that creases easily, so I just pinched along the
fold.
|
 |
|
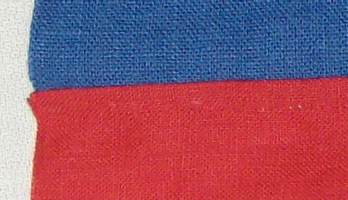
Flip the upper fabric down, so that the two pieces overlap
only along the seam.
Sides "A" of both pieces of fabric will now be facing
up. No stitches will be visible on that side of the piece.
Turn the piece over, so that Side B is facing up. You will
see a line of stitching and a flap of folded fabric.
|
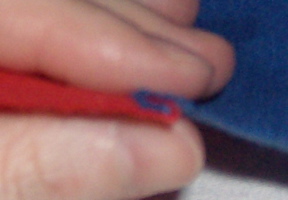
 Side A
(Sorry about the fuzzy picture.)
Side A
(Sorry about the fuzzy picture.)
|
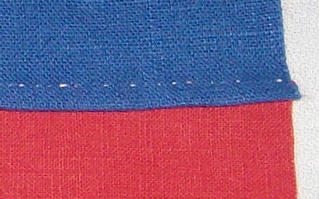 Side B
|
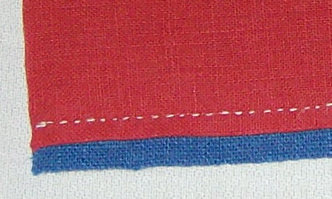
The final step is to complete the seam by securing the fold.
Again, you can use whatever stitch you like. In this case, both
sides of the stitching will show, one on Side A, against a background
of what was the upper fabric, and one on Side B, against a background
of what was the lower fabric.
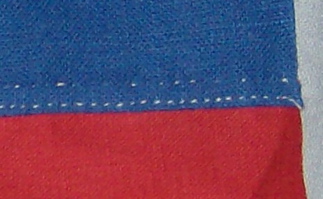 Side B
|
 Side A
|
Here, I've used the basic running
stitch again.
Stitch through all four layers of fabric, close to the fold.
|
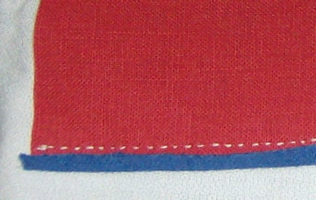
 Side B
|
Side A
|
Here, I've used a blind
hem stitch.
Go through all three layers when taking your "bite"
of the fold.
Obviously, in this case much less of the stitching shows on
Side A. If you match your thread to your fabric, you can make
the seam essentially invisible on that side.
|
This page was written and is maintained by Coblaith
Muimnech, who owns its copyright. Please do not reproduce
any portion of it without express permission.
Click to head to Coblaith's
homepage or the index to her articles
on techniques useful in making clothing and accessories for
use in the S.C.A.