


-- Michelle P. Brown,
Understanding Illuminated Manuscripts: A Guide to Technical
Terms
When I started looking for ways to disguise books at S.C.A. events, I never really expected to find support for something as simple and convenient as a book cover. What are the odds?
After stumbling across the above quote, however, I determined to learn more about chemise bindings, and to figure out how to make a reasonable version of one. The description in Understanding Illuminated Manuscripts was accompanied by a black-and-white photograph of one chemise. I found online a better, full-color photo of another--a 15th-century chemise from Valencia now in the collection of the Koninklijke Bibliotheek. And I rounded up useful illustrations from a few manuscripts:
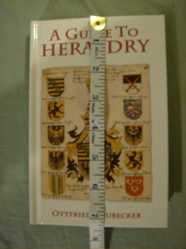
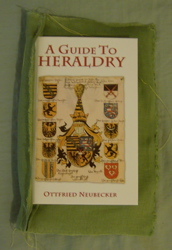
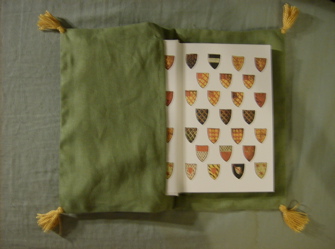
Using these images (most particularly the photo of the Valencian chemise) as my inspiration, I plotted a simple approach to making a plausible-looking version. I started with a book I meant to donate to the barony for use as largesse: a copy of A Guide to Heraldry, by Ottfried Neubecker. It was a convenient size, and had exactly the kind of glossy, modern cover I wanted to avoid giving for presentation in court.
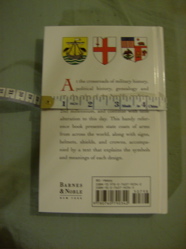
I made three measurements: (a) the height of the book, (b) the distance around the book from the outer edge of the back cover, around the spine, to the outer edge of the front cover, and (c) the inside width of the front cover, from the outer edge of the board to the inner edge, just at the fold:

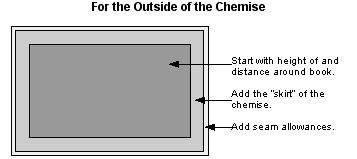
I then decided how much "skirt" I wanted my chemise to have (that is, how much I wanted the outer edge of the chemise to hang out past the edges of the book), and how much of a seam allowance I would need.
With these numbers in hand, I created four pattern pieces, thus:
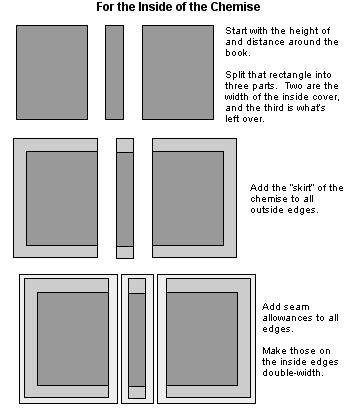
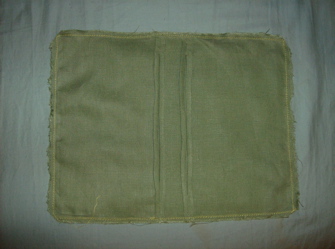
I cut the four pieces out of sage green linen. Then I pressed the inside edges of the three smaller pieces down by a little less than a single seam allowance and stitched them into place (using a narrow machine zig-zag stitch)*.
I lined up the front and center panels of the inside of the chemise, folded edges and right sides together. I measured down from the top and up from the bottom one seam allowance plus one chemise "skirt" and used a pin to mark those spots. Then I sewed down from the top edge to the top pin and up from the bottom edge to the bottom pin (using a machine running stitch). I used the zig-zagged edge of the fabric as my stitching guide, sewing as to leave it in the allowance for my seam.

I slipped the front cover through the slit, to make sure it fit. Then I repeated the procedure with the back panel, and did another test fit.
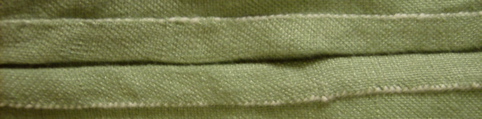
I trimmed my loose threads and pressed my seams open, continuing the creases from the top edge all the way to the bottom. I placed the outside of the chemise and the sewn-together inside of the chemise right-sides-together and sewed them along all four sides (first with a machine running stitch, then with a narrow machine zig-zag*), then clipped the corners. The chemise was essentially finished, except that the edges of the slits were only pressed down.
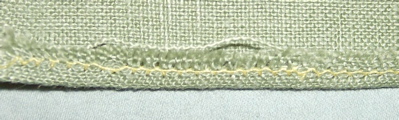
The final step was to blind-hem-stitch the edges of the slits, by hand (so that there would be no visible machine stitching in the finished project).
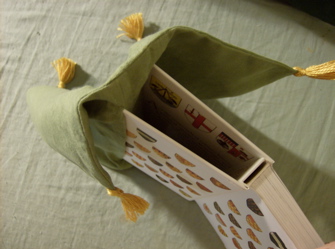
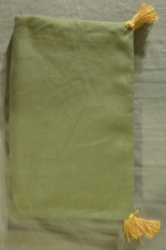
I turned the chemise right-side-out through one of the slits, squared the corners, and pressed it. Then I embellished it by adding built-in tassels made of silk embroidery thread to the four corners. (That detail was modeled on the chemise pictured in Understanding Medieval Manuscripts.)
Getting the chemise on took a little care. It was necessary to fold back the front and back covers and insert them into the slits simultaneously. (I intentionally made the slits just big enough, because I didn't want the chemise to be prone to shifting too much or falling off, so there wasn't much slack to work with.) Once that was done, it was fairly easy to shimmy the chemise up to the spine of the book, and when I closed the cover the whole thing sort of shrugged into place.
This chemise is an unassuming little thing, as is appropriate to the every-day reference book it houses. But the same basic pattern could produce lush, richly embellished covers for more singular tomes with little modification. (Did one wish to embroider a cover, for instance, one would naturally do so before making up the chemise, while cording would need to be incorporated when the sides were sewn together.) And, of course, one could hand-stitch the entire thing, were a greater degree of authenticity required.

*As I mentioned before, I used linen for this chemise. This particular linen ravels. And ravels. And then, just for a change of pace, it ravels. If your fabric is less likely to wiggle free of a straightforward seam, you may not need to bother with all the zigging and zagging; there shouldn't be a great deal of stress on the stitches.
 |
|||
|
|
This website is maintained by Coblaith Muimnech, who holds the copyright on all content not attributed to others. Printed copies may be made and distributed for non-commercial purposes, provided the author is credited. Please do not reproduce this article, with or without its accompanying illustrations, elsewhere on the Internet without first obtaining specific permission.
Click to head to Coblaith's homepage.